
To be completely and utterly transparent, Anthony and I are addicted to rotisserie chickens. They’re a quick, savory, low-effort dinner that usually costs under $10 (huge, considering how pricey groceries are these days) and they’re conveniently available to grab-and-go. Those two reasons alone would be enough to make rotisserie chickens a weekly staple for us, but the ability to get extra mileage out of them is what really keeps us coming back. After all the meat has been eaten with veggies, shredded and added to soup, or slapped between slices of bread to make a sandwich, only the bones remain. A chicken carcass might seem like something destined for the trash, but believe it or not, those bones are a culinary treasure trove. When added to a soup pot, lightly salted, covered in water, and left to boil along with your vegetable scraps from the week (ex: onions tops, carrots tops and ends, celery hearts, garlic ends, herb stems), chicken scraps magically transform into roughly 32 ounces of homemade bone broth… for free!
Now, on to the bad news about rotisserie chickens. In order to enhance flavor and tenderness, grocery stores inject them with a saline solution. This salty infusion results in deliciousness, yes, but it also makes one serving of rotisserie chicken carry 360-560 mg of salt. The number honestly doesn’t sound that bad when you consider that 2,300 mg is the recommended daily salt intake for healthy adults, but is anyone actually measuring their rotisserie portion before they inhale it? And what about sides, dipping sauces, and the other meals and snacks you’ve already had throughout the day?
I could lie and say it was a health crusade that made me start roasting chickens myself, but in reality, it was workers at my local grocery store going on strike. It turns out that rotisserie chickens are one of the first things to bite the dust if employees walk out, and when the Kroger protests hit the 10-day mark with no end in sight, I was forced to take matters into my own hands. And in the end, I’m glad that I had to start making whole chickens on my own because 1) they’re way healthier 2) there’s more meat on them 3) you can season them however you like 4) you can make insanely good gravy out of the drippings 5) you get even MORE bones and leftover meat for stock and 6) roasting chicken makes the house smells like heaven. A win-win-win-win-win-win, if you ask me.


Ready to cook?
For the roast chicken, you’ll need a casserole dish and a good meat thermometer; for the gravy, you’ll need a small saucepan, a strainer, and a whisk (or a fork and strong forearms); and for the bone broth, you’ll need a soup pot.
Roast Chicken:
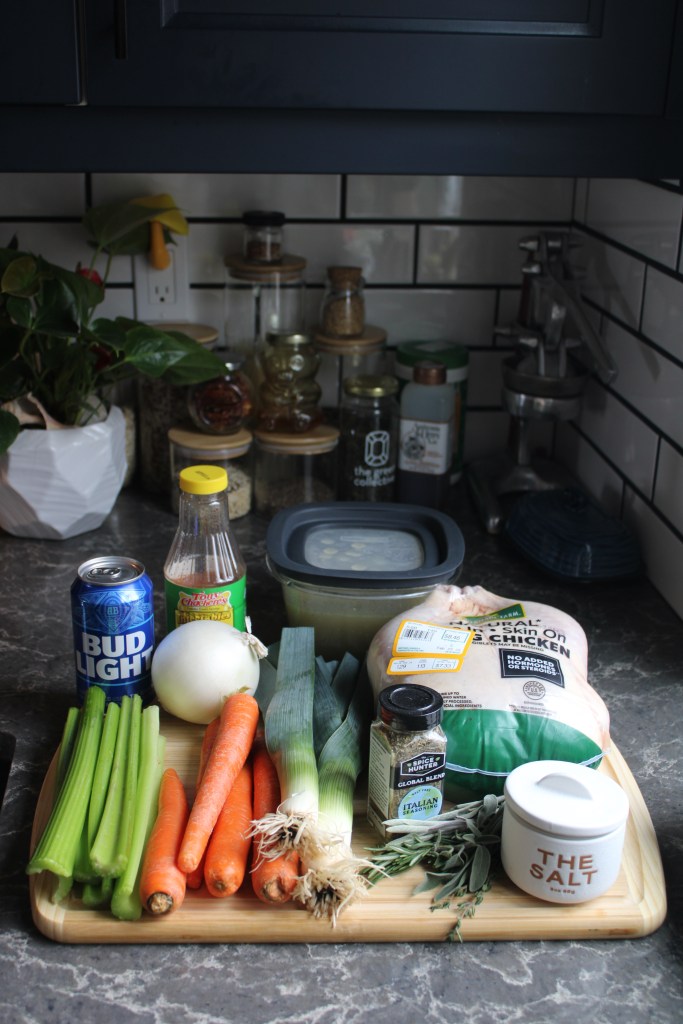
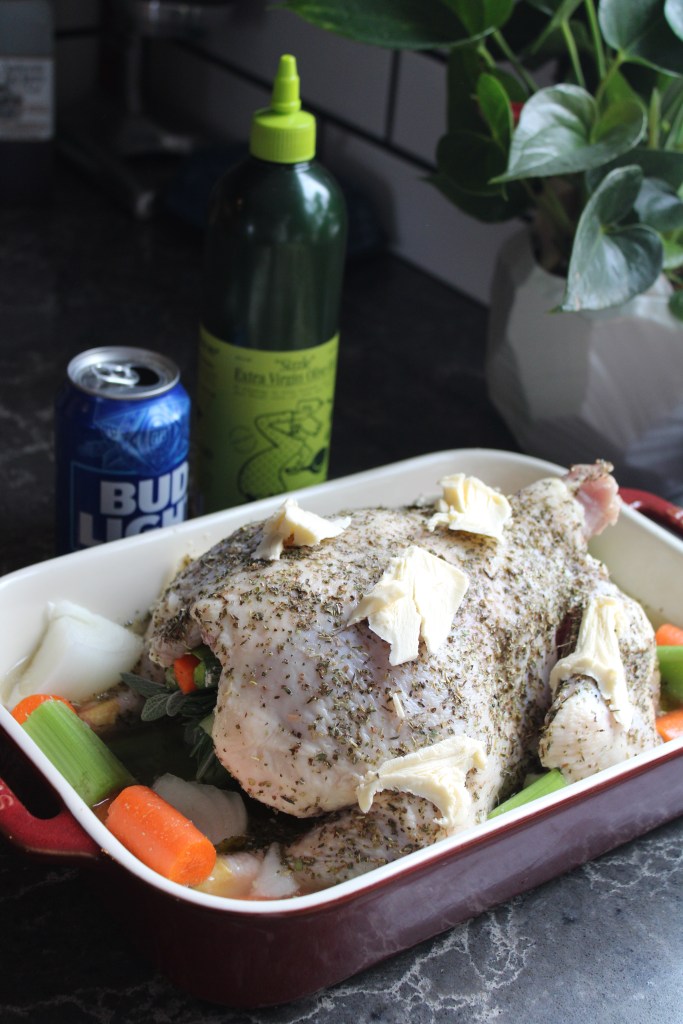
Ingredients: 1 whole chicken, 4 tbsp salt-free Italian seasoning, 5 large carrots, 5 large celery stalks, 2 leeks (dark green leaves removed), 4-6 peeled garlic cloves, 1 white onion, 1 package of fresh poultry herbs, 1 Bud Light, 1.5 cups chicken broth (low sodium), salt, and butter (or a butter alternative)
- Preheat oven to 350ºF with rack placed in the middle. Remove chicken from package, drain out all liquids, and ensure that the stuffing cavity is free of debris.
- Generously season chicken with Italian seasoning on all sides, making sure to cover the area between the wings and body (and any other external nooks). Sprinkle the chicken liberally with salt, then place on a flat surface.
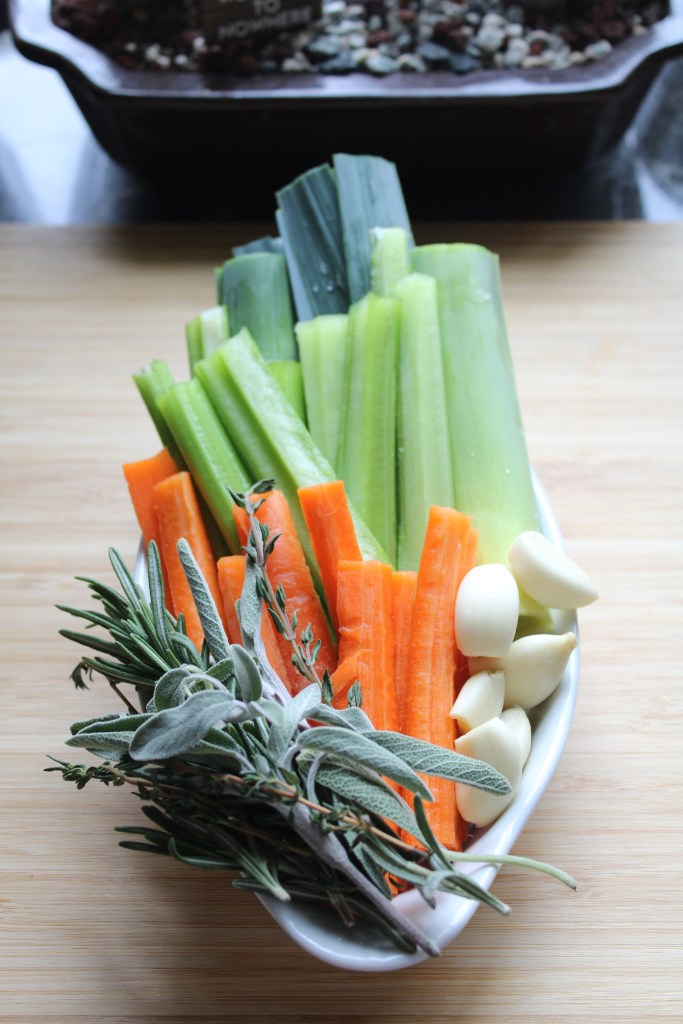
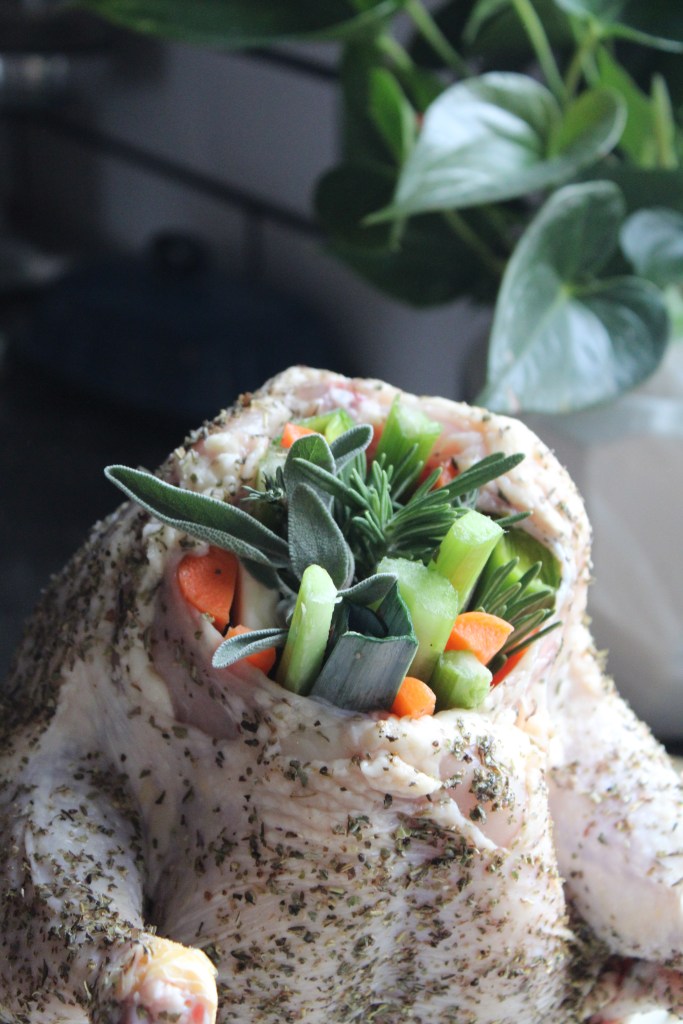
- Slice 3 carrots, 3 celery stalks, and both leeks into spears about 0.5 inches wide and 1 inch longer than the depth of the stuffing cavity. Add 2 tbsp of butter (or butter alternative) to the cavity, then add a mixture of vegetable spears to the base of the cavity. Place the poultry herbs on top of this layer, then fill in the remainder of the cavity with the rest of the spears and the garlic cloves. It’s okay if the vegetables overhang the edge of the cavity, and don’t worry about overpacking.
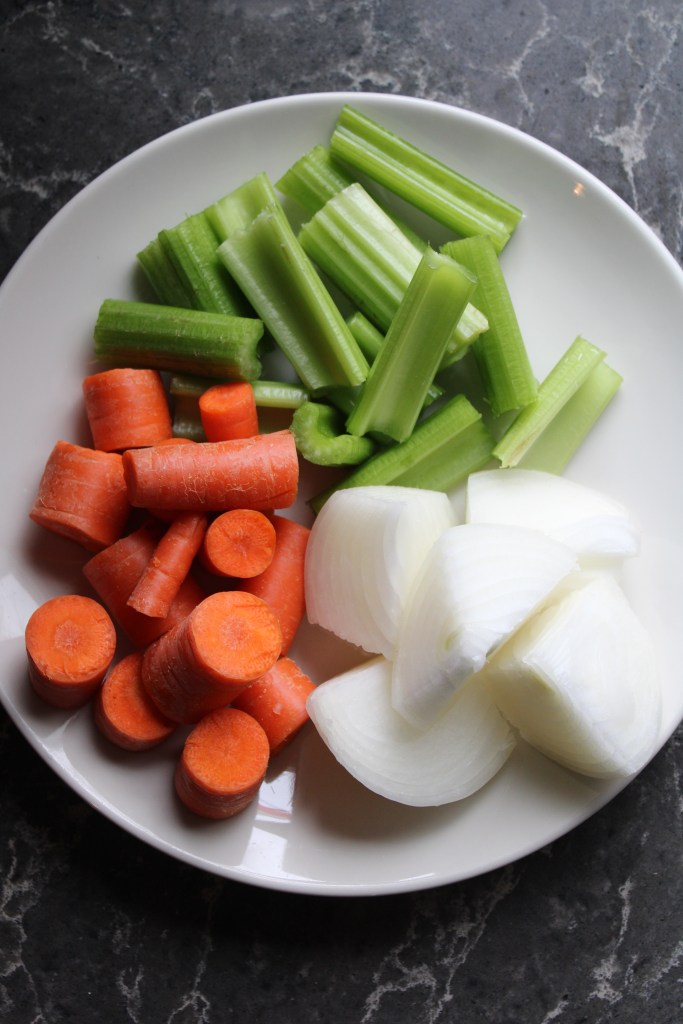
- Lightly grease casserole dish with olive oil and then place chicken in dish. Rough-chop remaining carrots and celery as well as the white onion, and fill all open space around chicken (but leave chicken completely exposed, you don’t want to bury it).
- Pour 1/2-3/4 of the beer can into the casserole dish (NOT on the chicken, it’ll rinse all the herbs and salt off), ensuring that it spreads evenly through dish. Add 2 cups of chicken broth in the same fashion.
- Generously dot the chicken’s surface with butter in 1tsp increments, then place in oven.
- Cook the chicken at 350ºF for an hour, then begin checking the internal temperature every 10 minutes. The desired temperature is 165ºF, and the reading should be taken from both the thigh and the breast- the thickest parts of the meat.
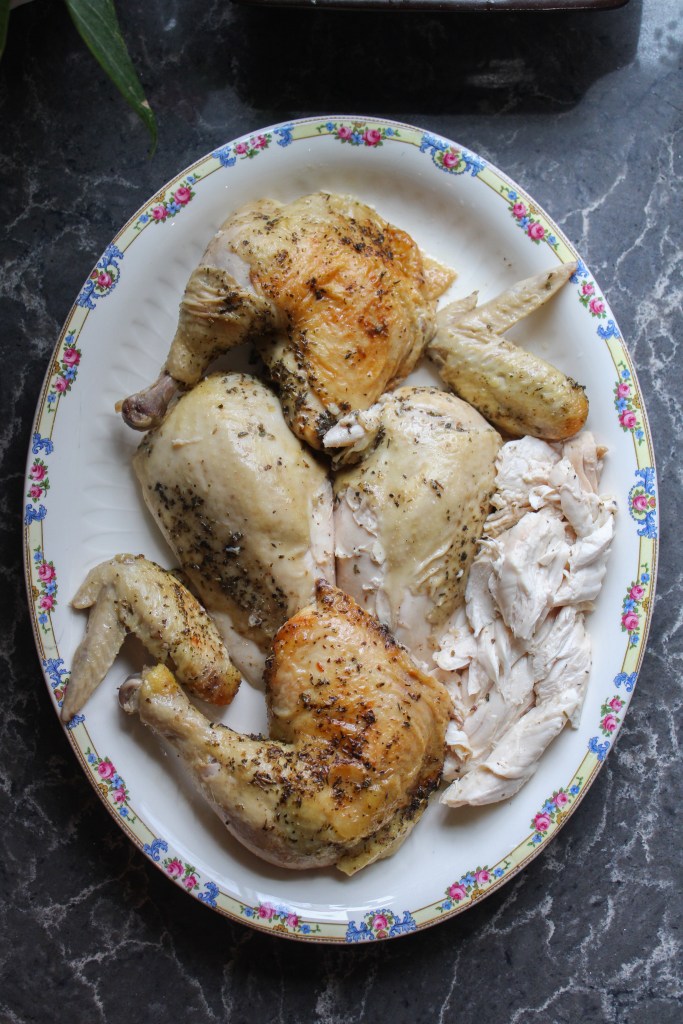
- Once the chicken hits 165ºF, remove from oven. Discard all surrounding vegetables and baste the chicken in its roasting liquid, then allow to sit undisturbed for 10-20 minutes.
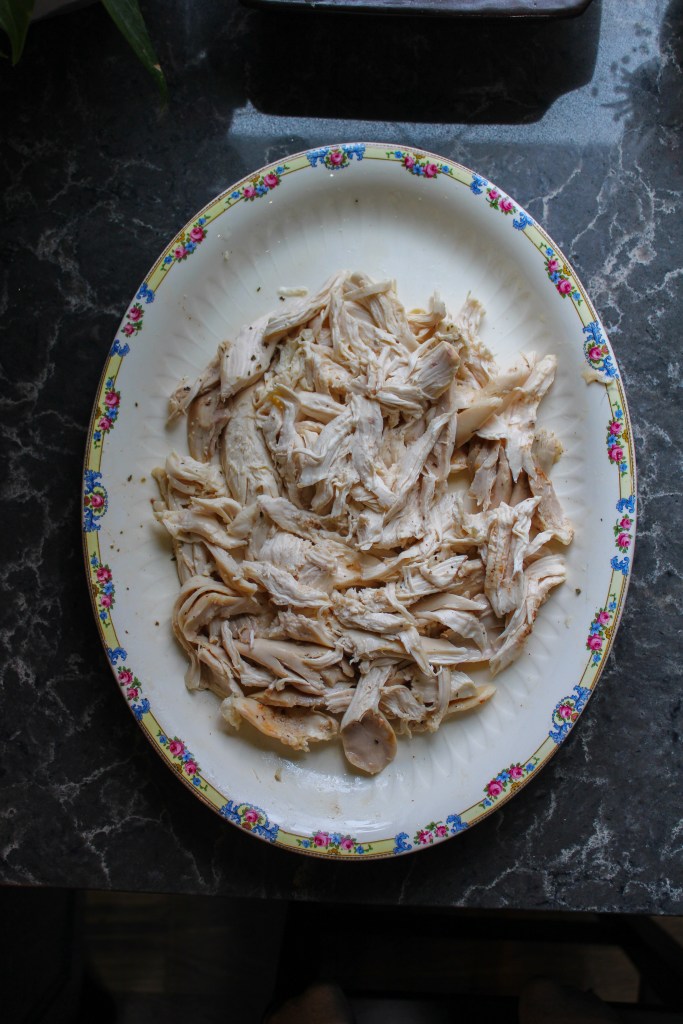
- After the resting time, transfer the chicken to a cutting board and carve, reserving the bones. Eat immediately, refrigerate, or freeze.
Chicken Gravy:
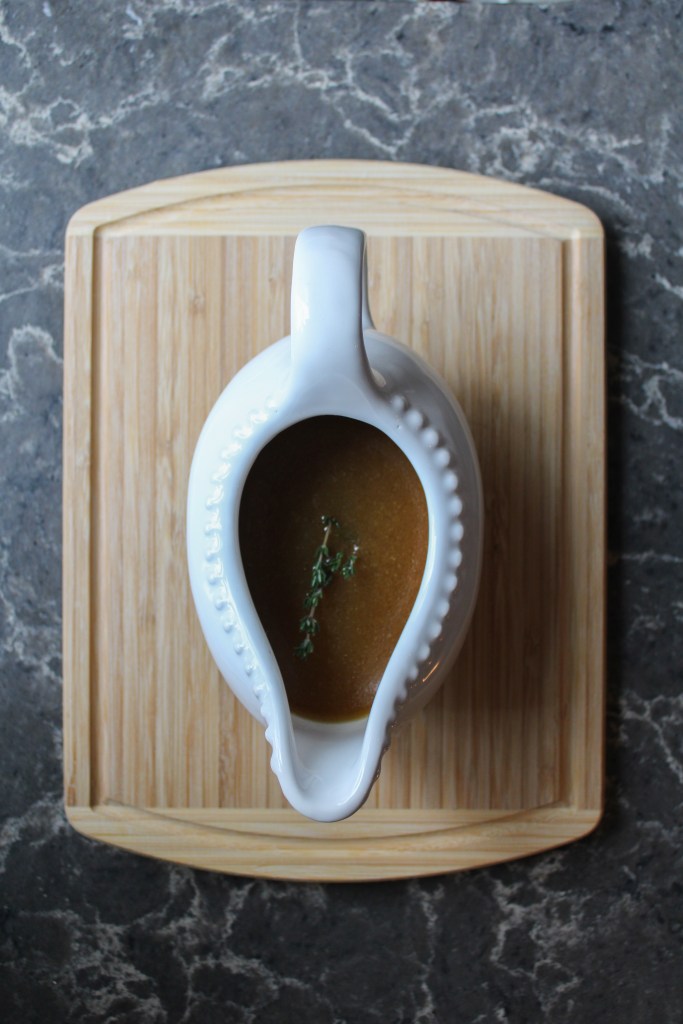
Ingredients: roast chicken cooking liquid and drippings, 3 tbsp cornstarch, 4 sprigs fresh thyme, 1.5 tbsp soy sauce.
- Pour all liquid contents from the casserole dish through a strainer and into a saucepan over medium heat. Discard all solids in the strainer.
- Remove 1 cup of roasting liquid and pour into a small bowl. Add the cornstarch to bowl and whisk briskly, until cornstarch is fully dissolved. Pour the mixture back into the saucepan and whisk for 1 minute.
- Add several whole sprigs of fresh thyme to the pot and bring the mixture to a simmer. Continue to simmer for 5-8 minutes, stirring every 60 seconds.
- Once the gravy has thickened and darkened in color, remove from heat, remove thyme sprigs (keep for broth), and serve.
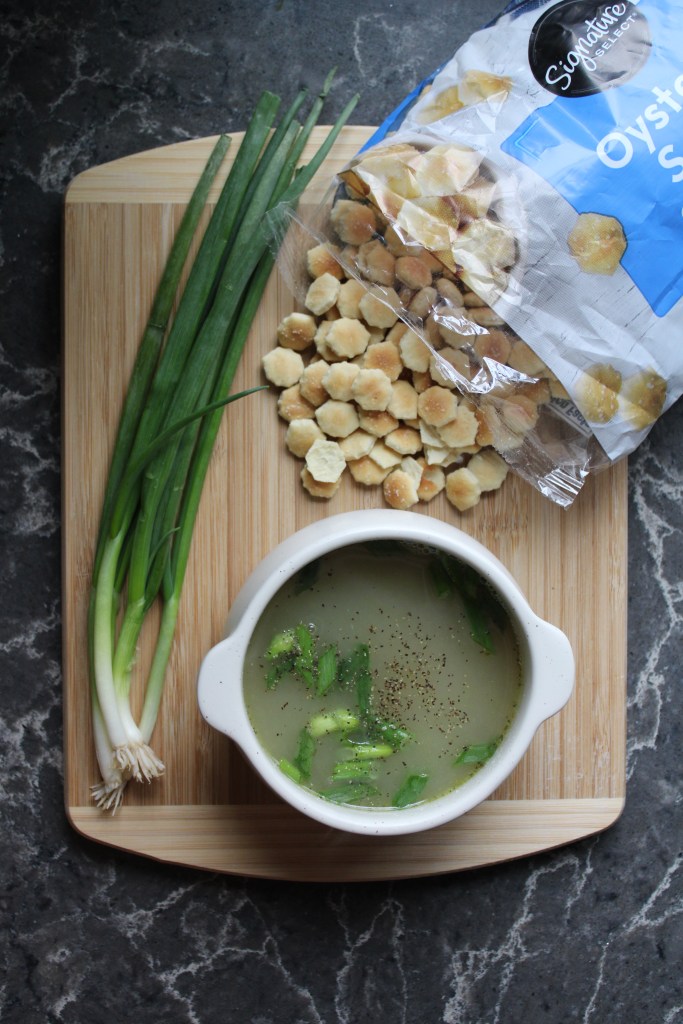
Chicken Broth*:
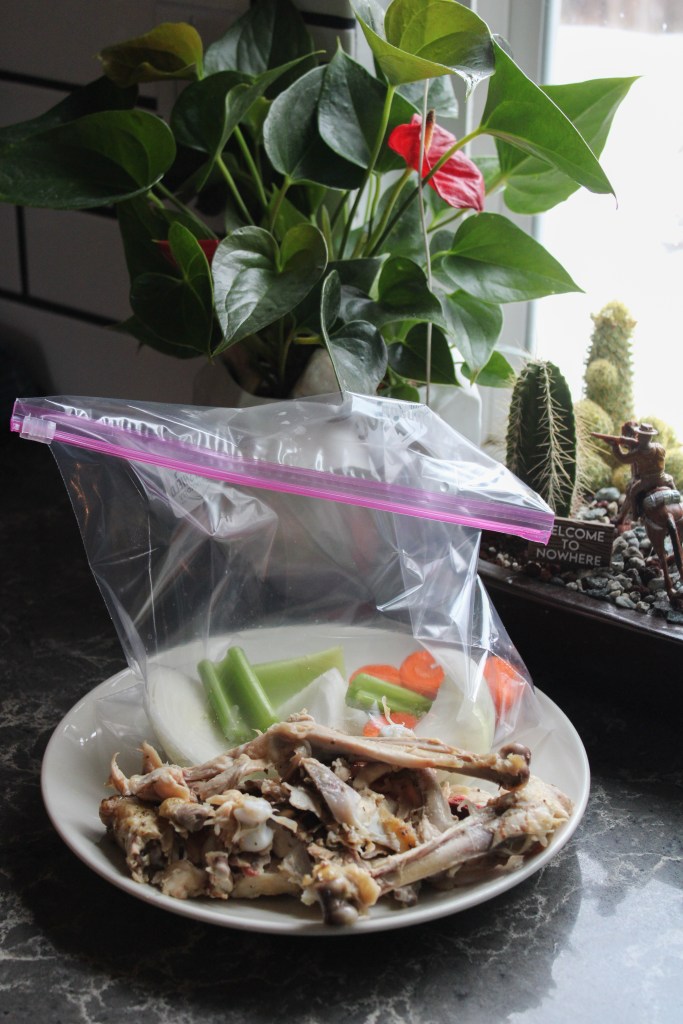
Ingredients: 1 chicken’s-worth of bones, 3 cups of vegetable scraps (or buy onions, carrots**, celery, and garlic specifically to make broth with), herb stems***, 2 bay leaves, and either salt or bouillon to taste
- Add all chicken bones to a large soup pot. Cover bones by 2 inches with cool tap water, then place on burner over medium-high heat.
- Add bay leaves, vegetable scraps, and herb stems, and stir well. It’s okay if the vegetables and stems float.
- Bring the mixture to a gentle boil and keep it there for 1 hour minimum. As liquid evaporates from the pot, pour in 2 cups of water at a time to replenish (if cooking for an hour, you may only need to do this once). Stir the mixture every 20 minutes or so to ensure nothing is sticking to the bottom.
- Once the liquid is fragrant and broth-colored, add in your salt and bouillon and stir until fully dissolved. Remove the mixture from heat and allow it to cool slightly (no longer steaming), then pour through a strainer and discard all solids. If freezing the broth, allow it to cool completely before covering and freezing.
*The longer you cook the broth, the more concentrated the flavor becomes. I like cooking mine for at least 2 hours!
**Don’t add more than 1.5 large carrots to the broth or else it gets shockingly sweet. You can’t overdo it with the onions, celery, or garlic though.
***Herbs that work best in a versatile chicken broth are parsley and thyme. If using stronger flavors like fresh basil or oregano, go light- a little goes a long way.
Discover more from Christina Cooks the World
Subscribe to get the latest posts sent to your email.

Leave a comment